
Are you looking to buy a LDO Input Shaper Toolkit in Australia?
The LDO input shaper toolkit provides all the necessary parts for performing Klipper input shaper calibration with minimal hassle. For detailed information regarding klipper input shaper functionality see this page. The toolkit contains an easy to mount PCB containing the ADXL345 accelerometer as well as a lightweight FFC ribbon cable and RPI connector board for easy connection between the accelerometer and your Raspberry Pi.
Mounting
A small part can to be printed for mounting the accelerometer PCB onto various toolheads:
- Mini Afterburner Mount - for Voron 0.1
- Afterburner Mount - for Afterburner (Voron 2.4, Trident, Switchwire)
If a compatible mount is not available, or if you want to design your own mount, please refer to the following drawing:
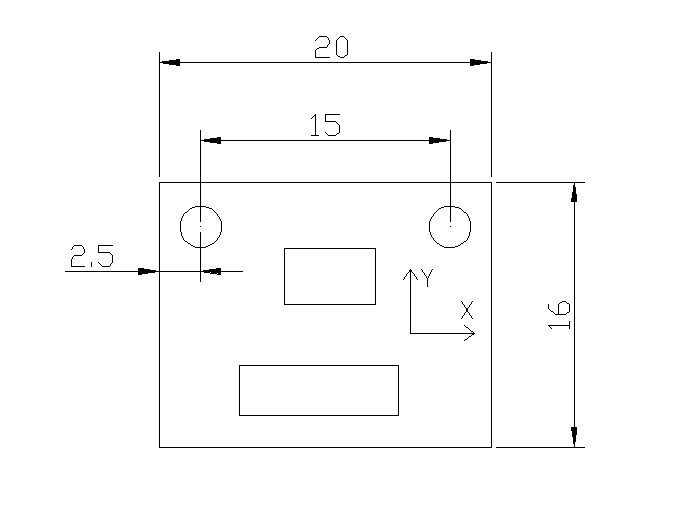
Alternatively, you may also choose to mount the accelerometer using double sided tape.
Wiring
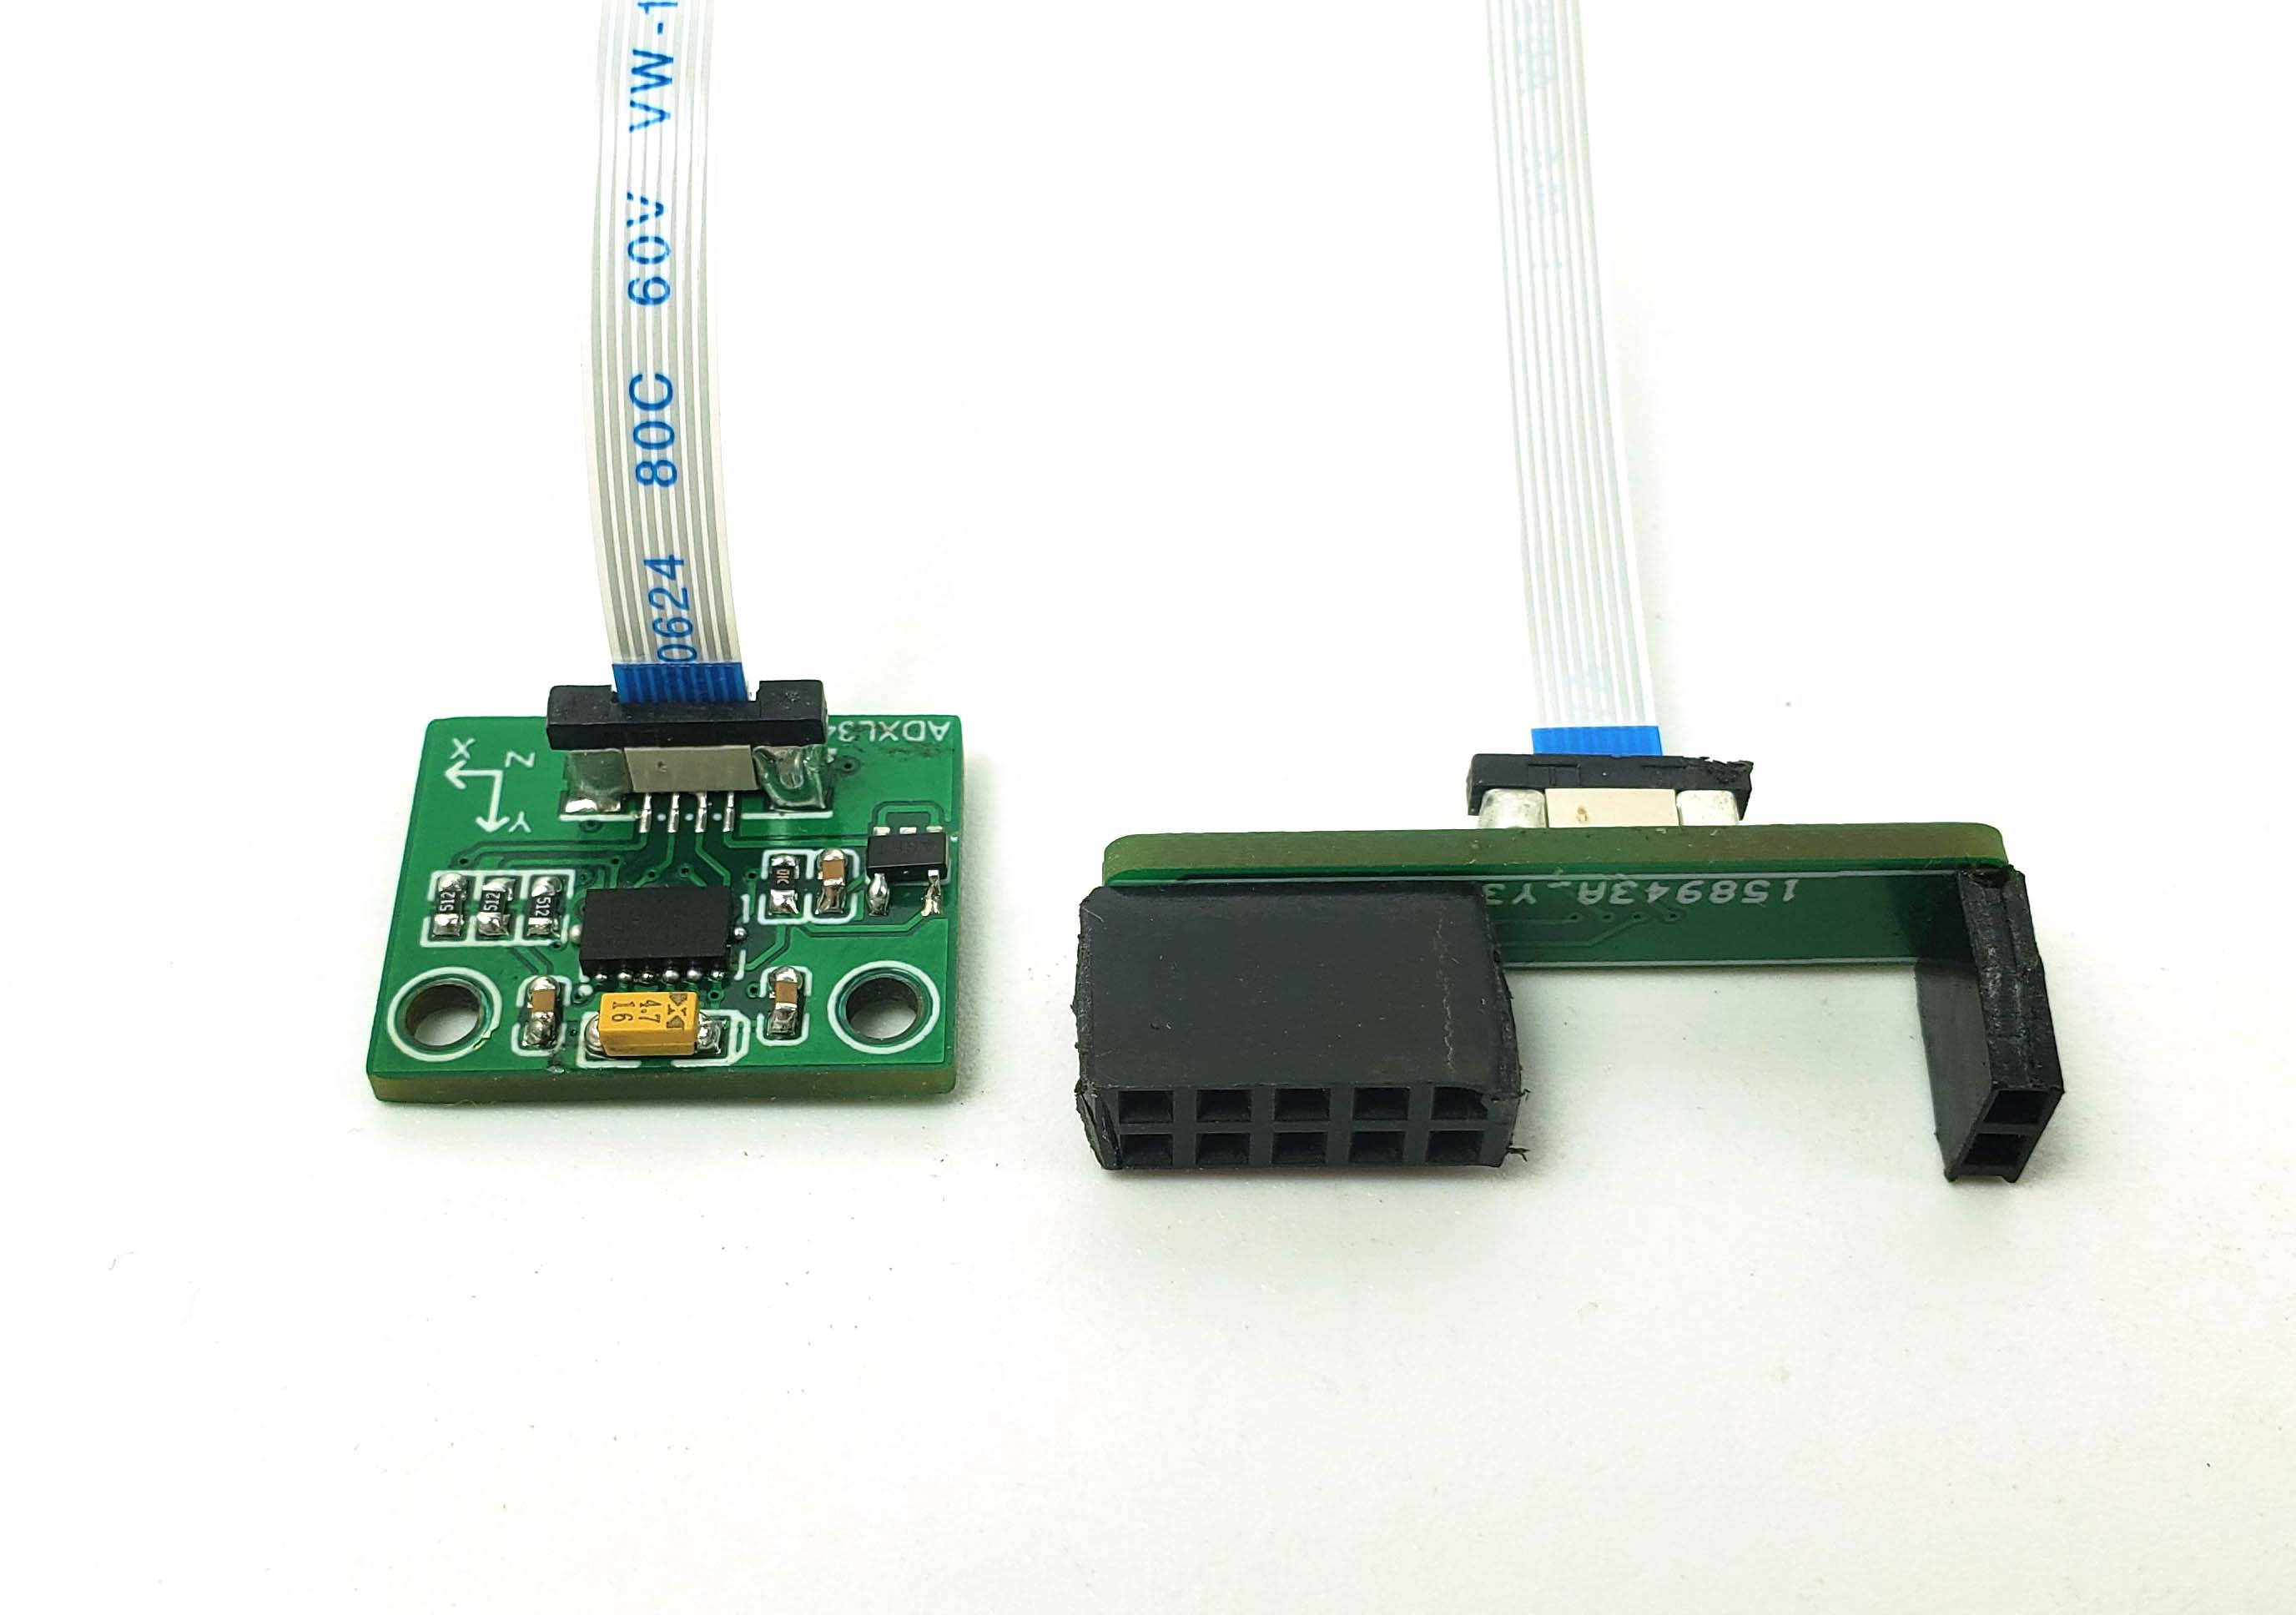
Wiring the input shaper tool is simple. First attach the FFC ribbon cable to each PCB: carefully pull up the black tab on the FFC connector, then insert the FFC ribbon cable and push the tab back in. Take care when pulling up the black tab! It is fragile and will break if pulled with excessive force. To make sure the polarity of the ribbon cable is correct, refer to the following picture:
Now install the smaller PCB onto your Raspberry Pi as follows:
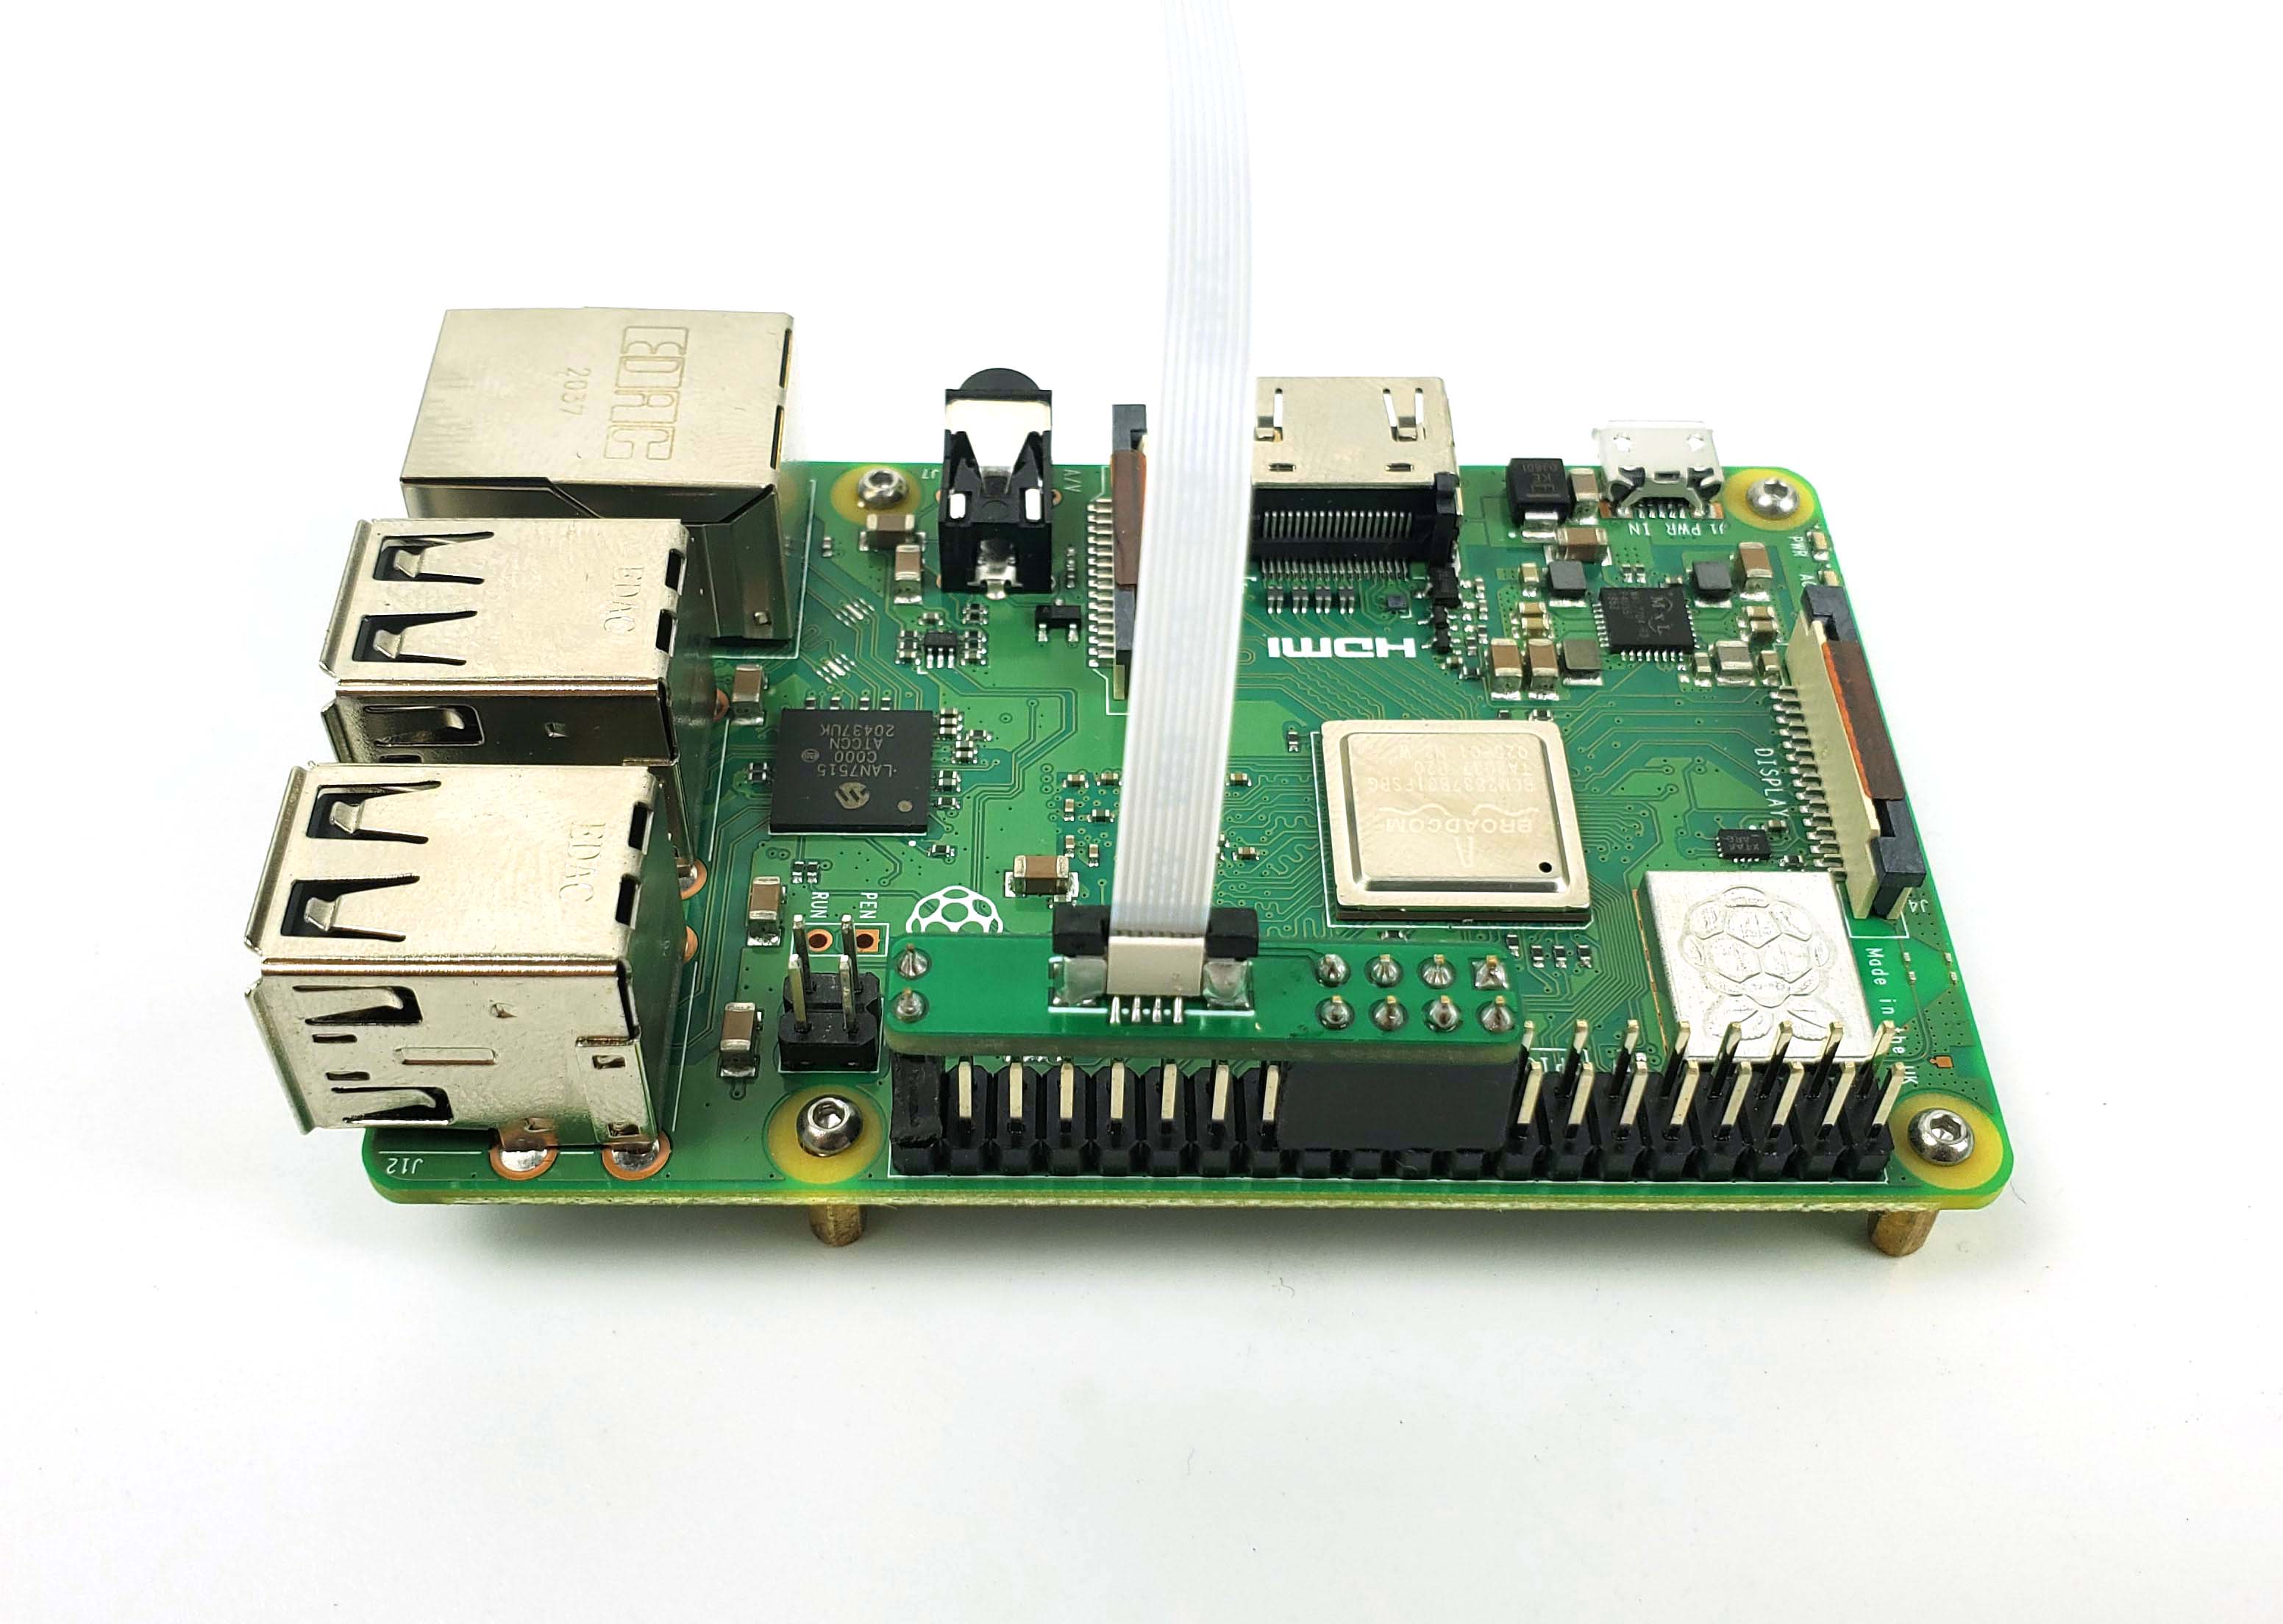
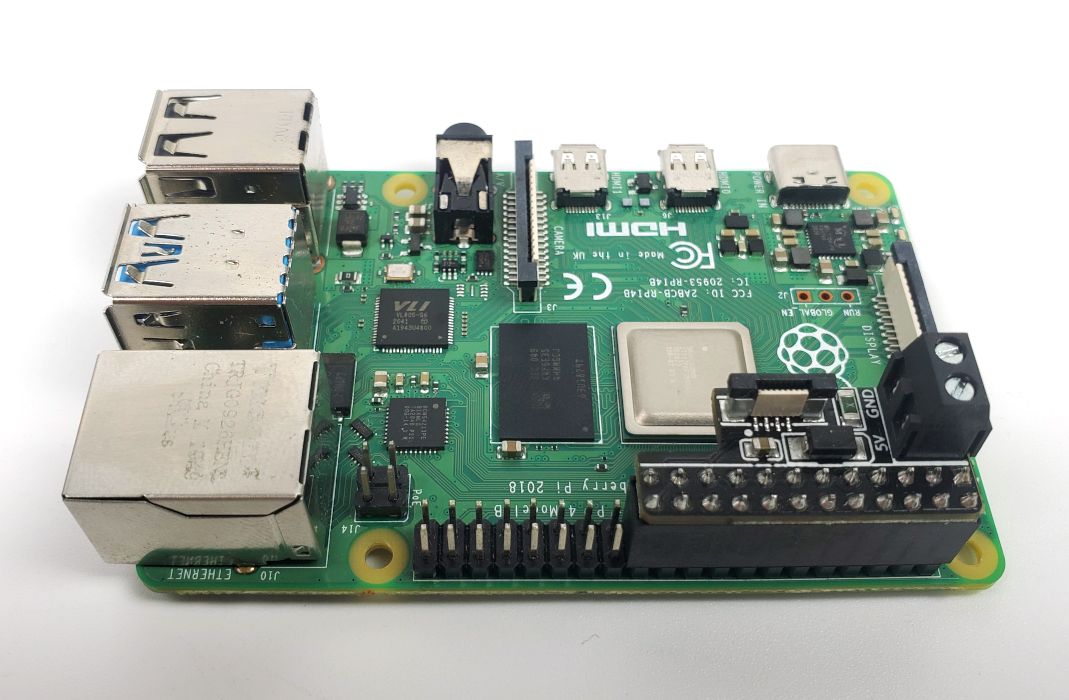
Note that Version 2 of the Pi PCB integrates a screw terminal for the 5V Rail of on the Raspberry Pi. This screw terminal can be used to supply power to the Raspberry Pi instead the USB port (Micro on RPi3 and Type C on RPi4).
Software Installation
Before you can start running input shaper calibration, you need to install a few software packages on your Raspberry Pi. Refer to the software installation section in the klipper input shaper documentation.
Checking the Setup
To test everything works correctly, run the command ACCELEROMETER_QUERY in your klipper console. If everything is correct, you should see some measurements from the accelerometer on the console output.
Calibration
The easiest way to perform calibration is to simply run the command SHAPER_CALIBRATE in your klipper console. Be sure to read the corresponding section in klipper's documentation for more details and advanced commands and settings.
Browse more
- Browse all LDO
- Browse all Voron Parts and Accessories